Tag: excel data validation

  • Using Data Validation in Excel

    Using Data Validation in Excel

    Data validation in Excel allows us to set parameters on what can be entered into a cell and we can also choose what happens when invalid data is entered. This is very useful in keeping the data tidy. We have more predictable data which can help with future analysis and calculation. As a quick example, if we want to collect data on how many pets each person has, we may end up having data such as “one”, “2”, “2 dogs”, “none”. With data validation, we can make sure only whole numbers can be entered.

    How To Set Validation Criteria On Cell(s)

    To set up data validation:

    1. Highlight the cells (or range of cells) we want to apply data validation on
    2. Go to Data tab and select Data Validation:
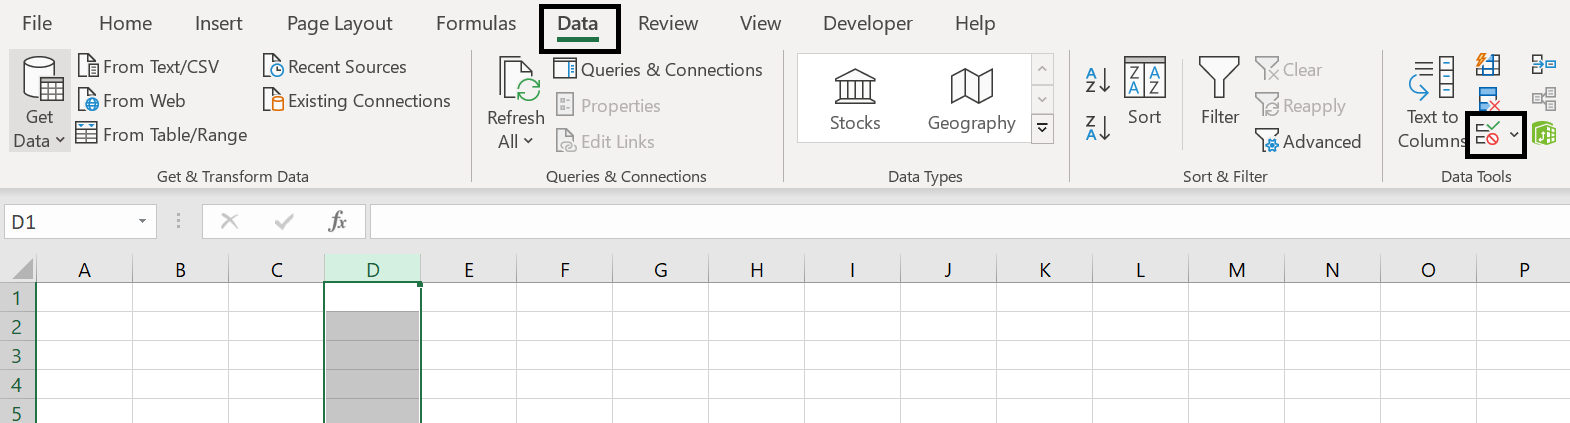
      data_validation_setup
    3. By default of course, data validation would allow “any value” to be entered. Here in the “Allow” field, we can change that. Have a look at the list below
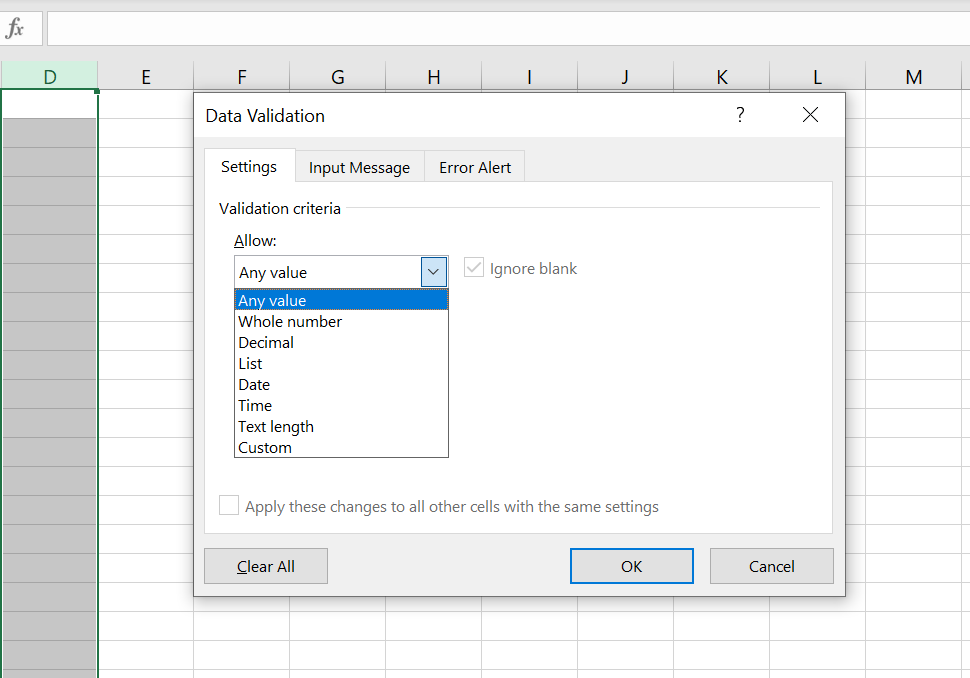
      data_validation
    Whole number & Decimal

    With whole number & decimal, we can make sure only numbers are entered into the cell. Of course choose wisely whether whole number or decimal should be selected. With example given at the very top, if we want to count the number of pets each person does, having decimals would not make much sense so whole number would be preferred.

    Once whole number or decimal is selected, we will need to set further parameters around what numbers can be entered.
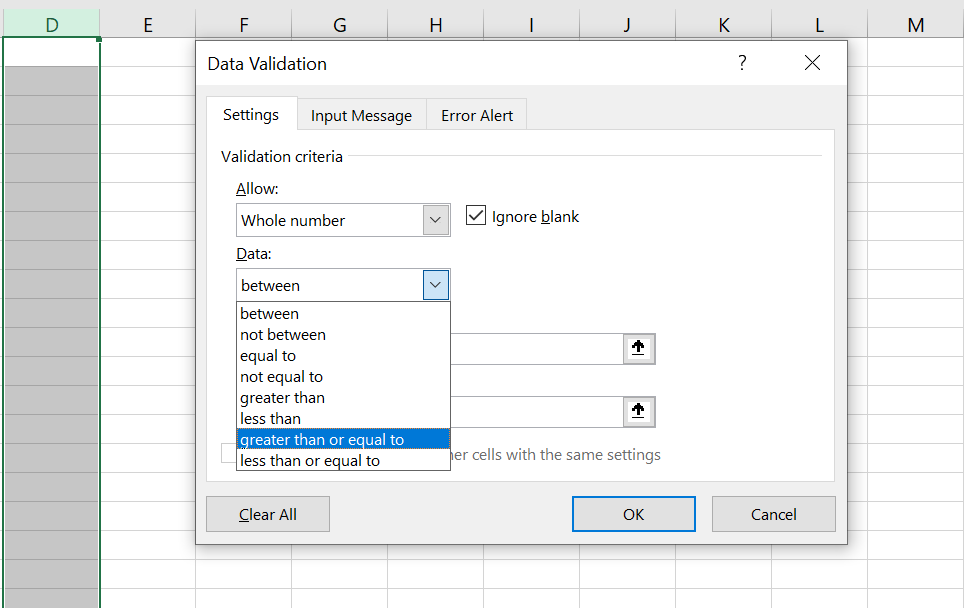
    data_validation_numbers

    Again this can be particularly useful as we can further narrow down what can be entered. As an example if we are collecting data on how many days people are exercising in a month, it will be wise to set the parameter between 0 to 31 as you can’t have negative days or more than 31 days in a month.

    If we want to allow a wide range of numbers to be entered, we can always set whole number/decimal between -100000000000 to 100000000000.

    Date & Time

    Date and time are similar to whole number and decimal. Once we selected either one, we will need to set further parameters to narrow down what can be entered. For example we can set validation criteria so that only time can be entered and must be greater than 6pm

    Tip:

    In Excel, 1 is represented as 1 day (24 hours). So 6pm (18:00) as a number is 3/4 (18/24) as a number. For more information, you can read more here: Date/Time in Excel. What it means here is if we set “greater than” 18:00 as validation criteria, Excel will allow us to enter any value greater than 0.75 even including 421 or 129 or 492 although these numbers are clearly not a time.

    To solve this, instead of using “greater than”, use “between” and set end time as 23:59. Doing this you will be able to prevent users from entering numbers such as 1 or greater. Fractions can still be entered as long as when converted back into time, they fall within the validation criteria.
    List

    This allows us to add a dropdown list. You can find more information here: Dropdown List in Excel. On that page, we go through how to add a dropdown list using data validation. And also how to add a dropdown list where the list changes depending on the value in another cell. For example:
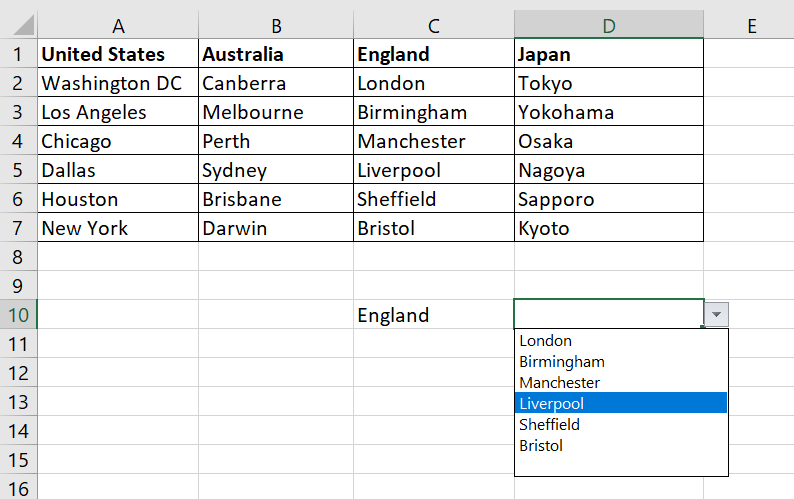
    data-validation-two-dropdown-lists

    What To Do When Invalid Data Is Entered

    We can also choose what happens when invalid data is entered. Go to the Error Alert tab after clicking on Data Validation:

    data-validation-error-alerts

    By default, Excel will always stop invalid data from being entered. An error message will pop up and the invalid data will be removed from the cell. In the Title and Error message fields, we can customize the message

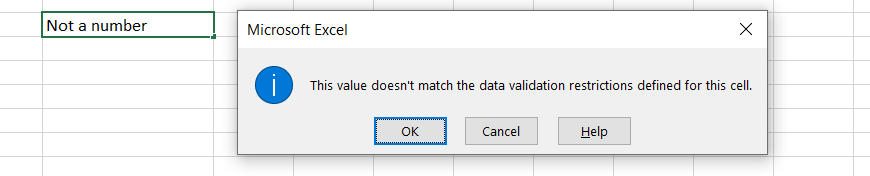
    Warning and Information are rather similar. Once invalid data is entered, an error message will still pop up. However we would have the option to allow or remove the data.
    data-validation-information-alert

    If we click “OK”, we are acknowledging the invalid data and allowing it to be entered. But if we click Cancel, the data will be removed.

  • Dropdown Lists in Excel

    Dropdown Lists in Excel

    How can we add a dropdown list in Excel? What if we want the dropdown list to change depending on another cell value? In this article, we will go through how to add a dropdown list in Excel. We will also look at how to have a dropdown list that users can overwrite. In addition we will go through how to add an alert or warning message when users wish to enter free text into a cell with dropdown list. And before the end, we will go through how to remove a dropdown list and also discuss the benefits of using a dropdown list.

    How To Add A Dropdown List

    We will first go through how to add a basic dropdown list:

    1. Select the cell or cells we would like to create a dropdown list for
    2. Go to Data tab at the top
    3. Click on Data Validation (see image below):

      data-validation-dropdown-list
    4. Allow: List
    5. For Source, there is a few ways we can decide what should be in the dropdown list:
      1. Type out the list and separate each option with a comma (e.g. blue, red, yellow, green)
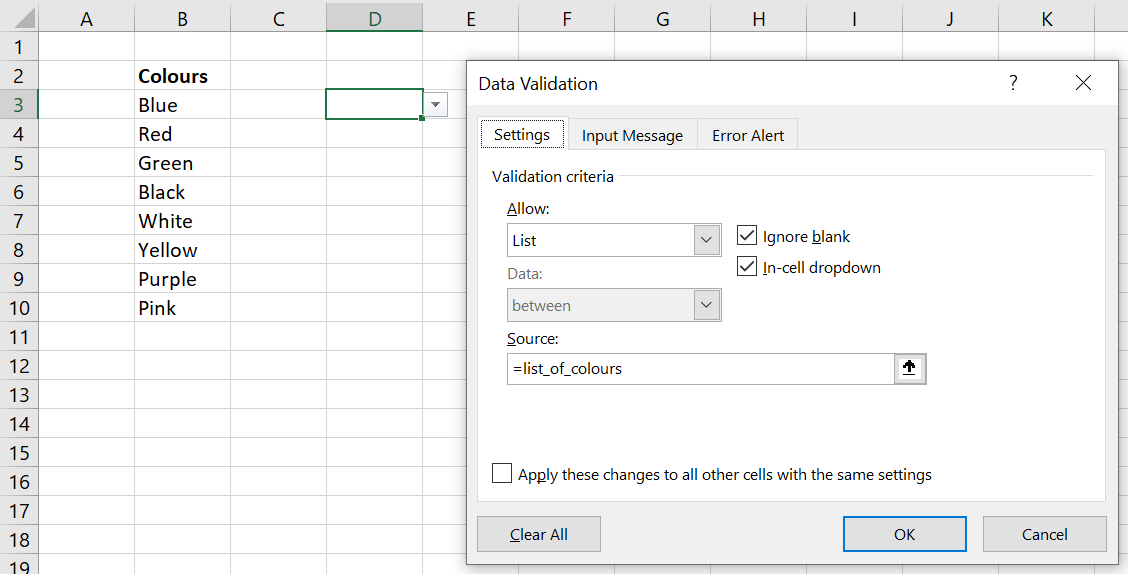
      2. Select the cells as a reference if the list is in the file. A benefit of this is that if the values of those cells are updated, the dropdown list will update automatically (see image below):

        data-validation-dropdown-list-source
      3. Reference by using Name Managers is also an option. Remember to put an equal sign before the name manager otherwise the name manager itself will become the dropdown list:

        data-validation-dropdown-list-name-manager

    We definitely prefer using Name Managers or cell references. Whichever way you would like to create your dropdown list, here’s the result:

    A Dropdown List That Can Be Overwritten

    With a dropdown list, you may or may not want the free text option to type in whatever you want into the cell. This means you can have either:

    1. A dropdown list and users must only select from the list
    2. A dropdown list but also give users the option to enter free text

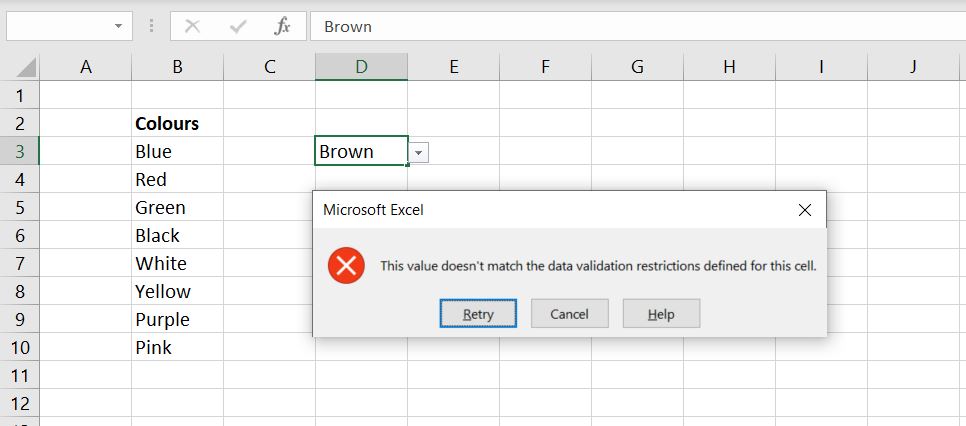
    There are definitely benefits with not allowing users to enter free text but there are times when it might be helpful. For example, it could be useful to have the most common selections available in the dropdown list but also allow users to type in their responses, should the value they want to enter is not in the dropdown list. By default, an error message will appear if we try to enter a value that is not listed as one of the options in the dropdown list:

    Dropdown-List-Error-Excel

    Luckily, we can change this. First, we go back into Data Validation. And in the Error Alert tab, make sure the “Show error alert after invalid data is entered” is not selected:

    Excel-Error-Alert-Excel

    Click OK to save.

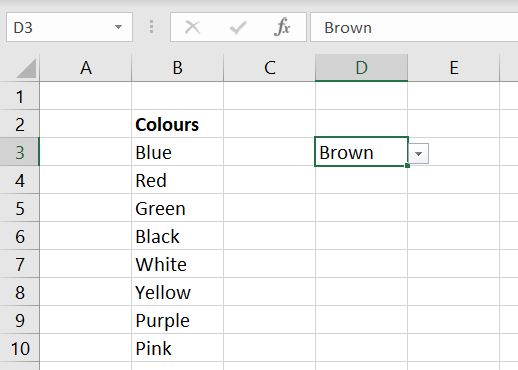
    Once that is done, we can now enter anything we want into the cell:

    Dropdown-Free-Text-Excel

    Alert or Warning Message

    In the section above, we went through how we can allow free text from users when there is a dropdown list. In this section we will show how we can allow users to enter free text into a cell that has a dropdown list but have a warning or alert message pop up whenever free text is entered.

    To do this, we go back into Data Validation > Error Alert tab:

    Warning-Message-Dropdown-List-Excel

    This time we leave the “Show error alert after invalid data is entered” box ticked and underneath that, we have:

    • Style: Warning
    • Error message: this is a free text field. You can have whatever error message pop up whenever invalid data is entered

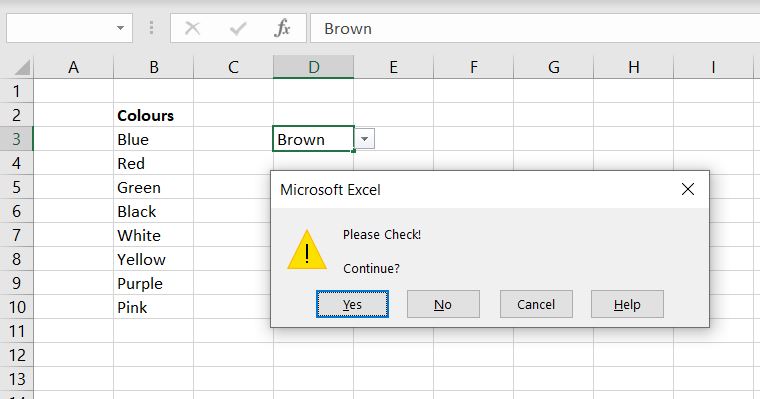
    Now let’s test this out again. When we enter “Brown” which is not one of the options in the dropdown list, we will see the following message:

    Alert-Message-Excel-Dropdown-List

    The benefit of this is that it would encourage users to check what they’ve put in. But it is not so restrictive that entering a different value becomes impossible.

    How to Remove a Dropdown List

    Removing a dropdown list is very simple. Simply go back into Data Validation and for Allow:

    • Instead of List, select Any value:

    Remove-Dropdown-List-Excel

    This will remove the dropdown list and we will be allowed to enter any value we want into the cell.

    The biggest benefit with using dropdown list is it limits what users can enter into the cell. It gives more predictable results and makes data easier to collate and analyze later on. Imagine you have a spreadsheet which will be used by several different users, even for simple data where you expect people to give a rating out of 10, you could end up getting data such as “1” or “one”, “unsure”, “low”, “19”. Data like that will take a long term to clean up.

    This is it so far with dropdown list. We hope you find this article useful. If we have missed anything or if you have any further questions on creating a dropdown list, please leave a comment below!